Snake plants (Sansevieria), also known as mother-in-law’s tongue, are among the most resilient and low-maintenance houseplants. Their striking, upright leaves make them a stylish choice for homes and offices alike. But even these hardy plants need a little extra care from time to time—especially when their roots outgrow their container.
Repotting your snake plant ensures healthy growth, prevents root crowding, and keeps the soil fresh. In this guide, you’ll learn exactly how to repot a snake plant, when to do it, and how to give it the best possible start in its new home.
When to Repot a Snake Plant
Snake plants are slow growers, but their thick rhizomes and roots can eventually fill the pot. It’s time to repot when you notice:
- Roots poking out from the drainage holes
- Soil is drying out unusually fast after watering
- The pot is cracking or bulging from root pressure
- Stunted growth despite good care
Best time to repot: Every 2–3 years, ideally in spring or early summer when growth is active.
What You’ll Need

Before you start, prepare these items:
- New pot – 1–2 inches larger in diameter than the current pot, with drainage holes
- Well-draining potting mix – cactus or succulent mix works best
- Clean, sharp knife or scissors – for trimming roots or dividing plants
- Gloves – optional, but recommended for handling leaves and soil
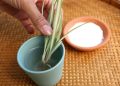
Step-by-Step: How to Repot a Snake Plant
1. Remove the Plant from Its Pot
Gently tilt the pot and slide the plant out. If it’s stuck, tap the pot sides or use a clean knife to loosen the edges.

2. Inspect the Roots
Healthy snake plant roots should be white or light tan. Trim away any brown, mushy, or rotten roots with sterilized scissors.

3. (Optional) Divide the Plant
If you’d like more snake plants:
- Use a clean knife to cut through the rhizomes.
- Make sure each division has at least one healthy leaf and root system.
4. Prepare the New Pot

Add a layer of fresh, well-draining soil to the bottom. Avoid dense potting mixes that retain too much moisture.
If you’re unsure what soil to use, check out our guide on how to choose the best soil for snake plants for detailed recommendations and DIY mix recipes.
5. Replant
Position the plant in the new pot so it sits at the same depth as before. Fill around the roots with fresh soil, pressing lightly to remove air pockets.

6. Water Lightly
After repotting, water sparingly—just enough to settle the soil. Allow the soil to dry out completely before watering again.

Aftercare Tips
- Light: Place in bright, indirect sunlight for best results.
- Water: Resume your regular watering schedule, but avoid overwatering.
- Fertilizer: Wait about a month before fertilizing to let the roots recover.
FAQs About Repotting a Snake Plant
1. Do snake plants like big pots?
Not really. Snake plants prefer a snug pot, which helps prevent excess moisture in the soil. Choose a pot only 1–2 inches larger than the current one.
2. Can you repot a snake plant in winter?
It’s best to repot in spring or summer when the plant is actively growing. Repotting in winter can slow recovery.
3. Should I water my snake plant right after repotting?
Yes, but only lightly. Overwatering right after repotting can cause root rot. Let the soil dry fully before the next watering.
4. What type of soil is best for a snake plant?
Use a well-draining mix—cactus or succulent soil is ideal. You can also make your own by mixing potting soil with perlite or coarse sand.
5. Can I use regular potting soil for a snake plant?
Yes, but improve drainage by adding sand, pumice, or perlite to prevent soggy roots.
6. How do I know if my snake plant needs a bigger pot?
Watch for roots circling inside the pot, emerging from drainage holes, soil drying too quickly, or a top-heavy plant.
Final Thoughts
Repotting a snake plant is simple, but it makes a big difference in your plant’s health and appearance. With a fresh pot, airy soil, and a little aftercare, your snake plant will keep growing strong for years—bringing beauty and fresh air into your space.